| .vscode | ||
| docs | ||
| include | ||
| lib | ||
| src | ||
| test | ||
| webapp | ||
| webapp_dist | ||
| .gitignore | ||
| auto_firmware_version.py | ||
| LICENSE | ||
| partitions_custom.csv | ||
| platformio.ini | ||
| README.md | ||
OpenDTU
Background
This project was started from this discussion (Mikrocontroller.net). It was the goal to replace the original Hoymiles DTU (Telemetry Gateway) with their cloud access. With a lot of reverse engineering the Hoymiles protocol was decrypted and analyzed.
Features for end users
- Uses ESP32 mikrocontroller and NRF24L01+
- Multi-Inverter support
- MQTT support
- Nice and fancy WebApp with visualisation of current data
- Firmware upgrade using the web UI
- Default source supports up to 10 inverters
- Timezone support
Features for developers
-
The mikrocontroller part
- Build with Arduino PlatformIO Framework for the ESP32
- Uses ESPAsyncWebserver and Async MQTT client
-
The WebApp part
- Build with Vue.js
- Source is written in TypeScript
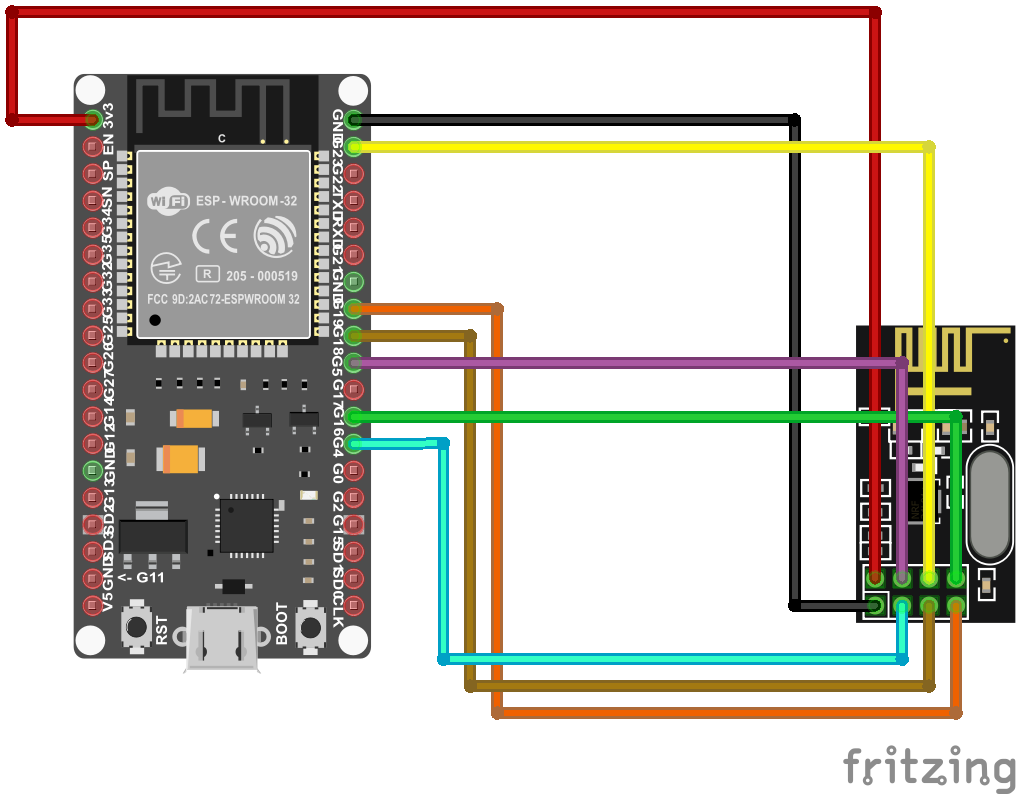
Wiring up
Schematic
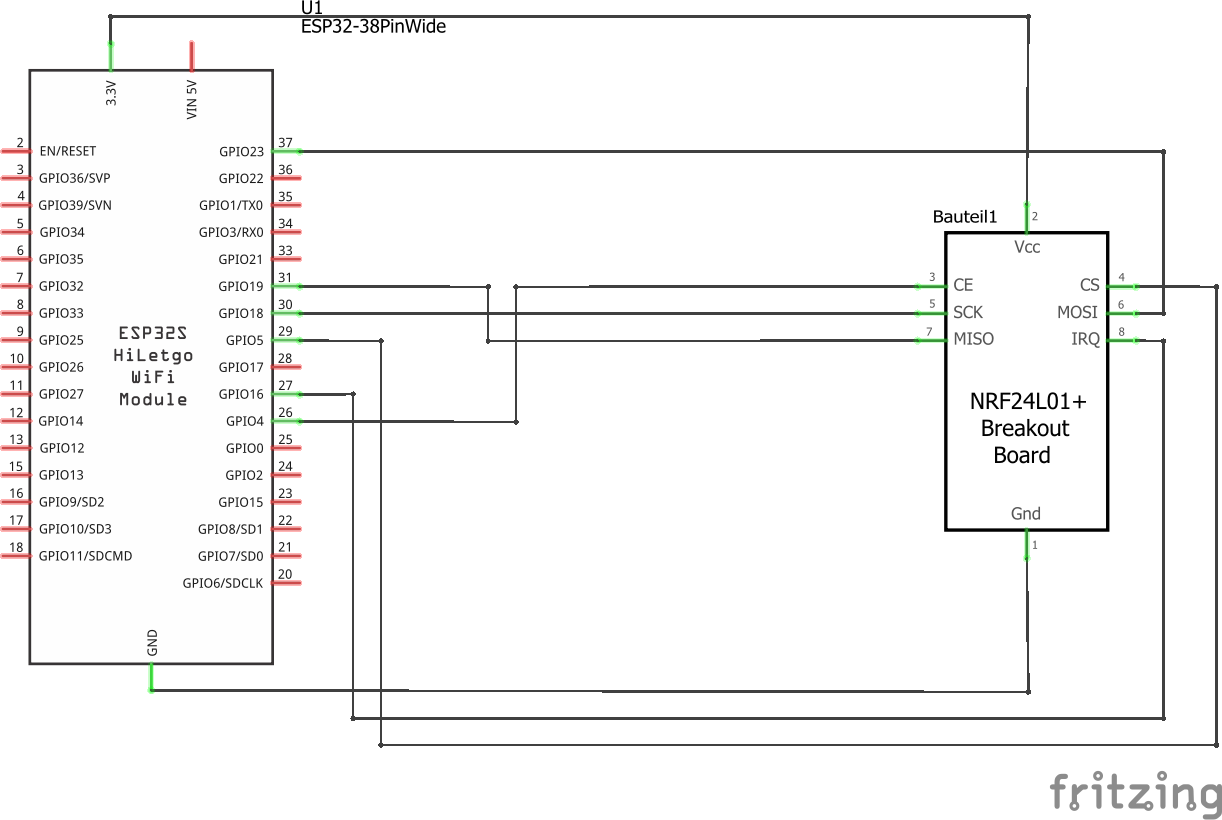
Symbolic view
Flashing and starting up
- Install Visual Studio Code
- In Visual Studio Code, install the PlatformIO Extension
- Download or clone this repository
- In Visual Studio Code, choose File --> Open Folder and select the previously downladed source code. (You have to select the folder which contains the "platformio.ini" file)
- Adjust the COM port in the file "platfrmio.ini". It occours twice:
- upload_port
- monitor_port
- Select the arrow button in the status bar (PlatformIO: Upload) to compile and upload the firmware. During the compilation, all required libraries are downloaded automatically.
First configuration
- After the initial flashing of the mikrocontroller, a Access Point called "OpenDTU-*" is opened. The default password is "openDTU42".
- Use a webbrowser to open the address http://192.168.4.1
- Navigate to Settings --> Network Settings and enter your WiFi credentials
- Currently you have to look at your router to determine the IP of the newly connected device
Building
-
Building the WebApp
- The WebApp can be build using yarn
$ yarn install $ yarn build- The updated output is placed in the 'data' directory
-
Building the mikrocontroller firmware
- Visual Studio Code with the PlatformIO Extension is required for building